 Note: The system firstly attempts to shut down the VM instances gently. If the shutdown fails, the system will perform force shutdown.
The V2V job name must be 1 to 128 characters in length and can contain Chinese characters, letters, digits, hyphens (-), underscores (_), periods (.), parenthesis (), colons (:), and plus signs (+).
Note: Note: cmd-->“powercfg -h off”cmd-->“powercfg -h on”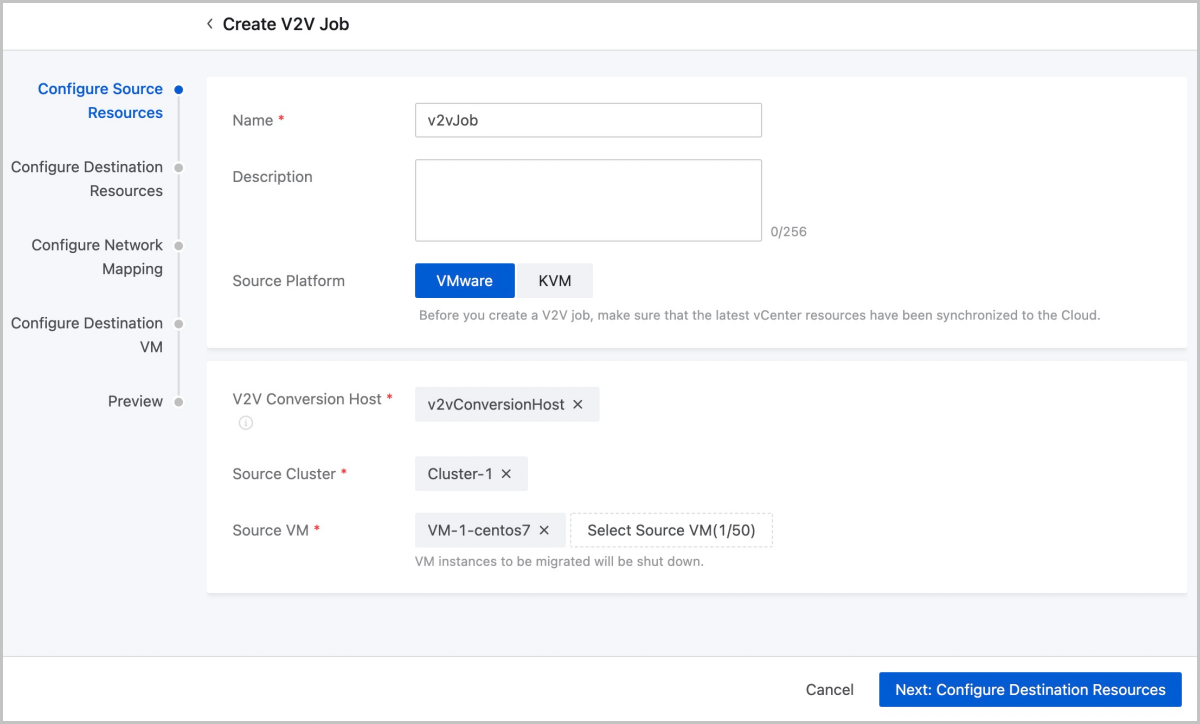 Note:
Note: 
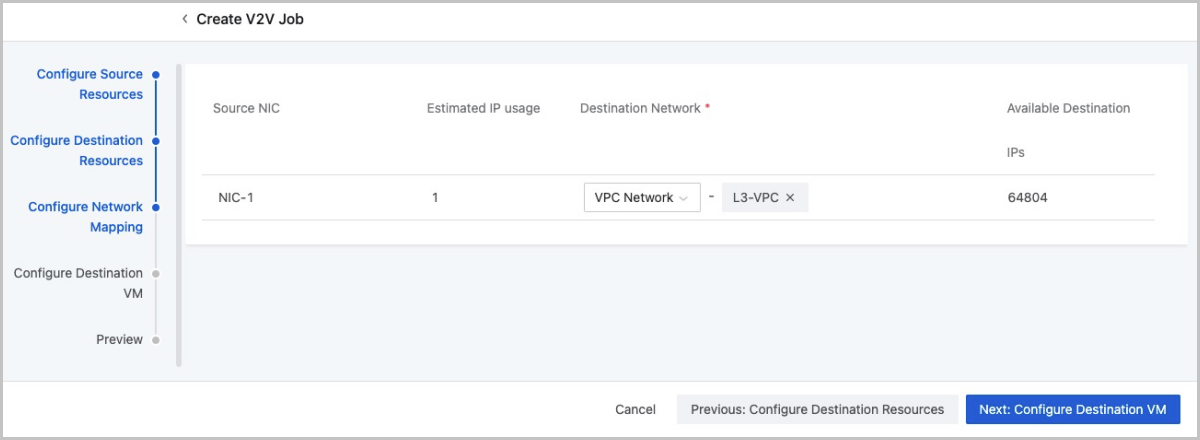
 Note: Note: If not configured, the IP address of the destination NIC will be allocated by the system.Note: If not configured, the MAC address of the destination NIC will be the same as that of the source NIC after migration.Note: Note: If not configured, the IP address of the destination NIC will be allocated by the system.Note: If not configured, the MAC address of the destination NIC will be the same as that of the source NIC after migration.Note: Before you migrate a VM instance to the current cloud, make sure that the VM instance has at least one NIC attached.
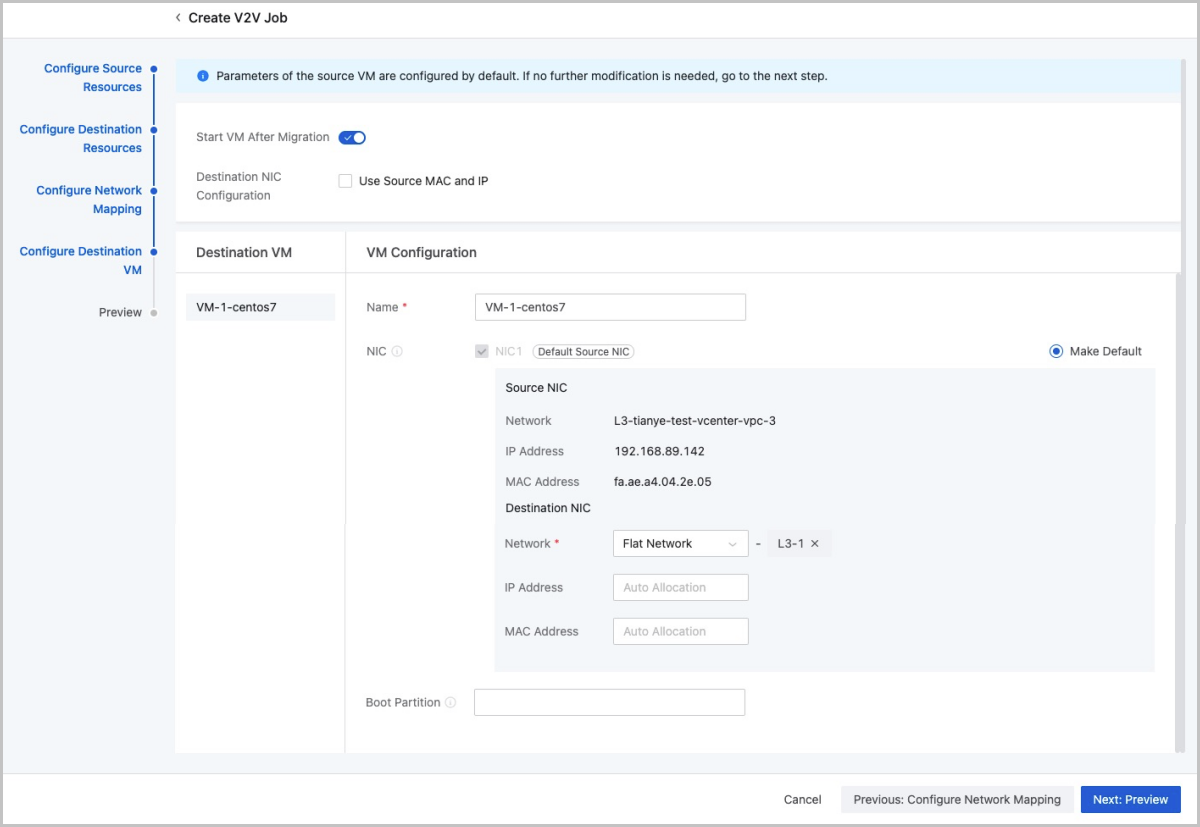
On the main menu of ZStack Cloud, choose . Then, the V2V Migration page is displayed.
| Action | Description |
|---|---|
| Reboot V2V Job | Reboot a V2V job if the job failed.Note:
|
| Edit V2V Job | Modify the name and description of a V2V job. |
| Delete V2V Job | Delete a V2V job after migration. |
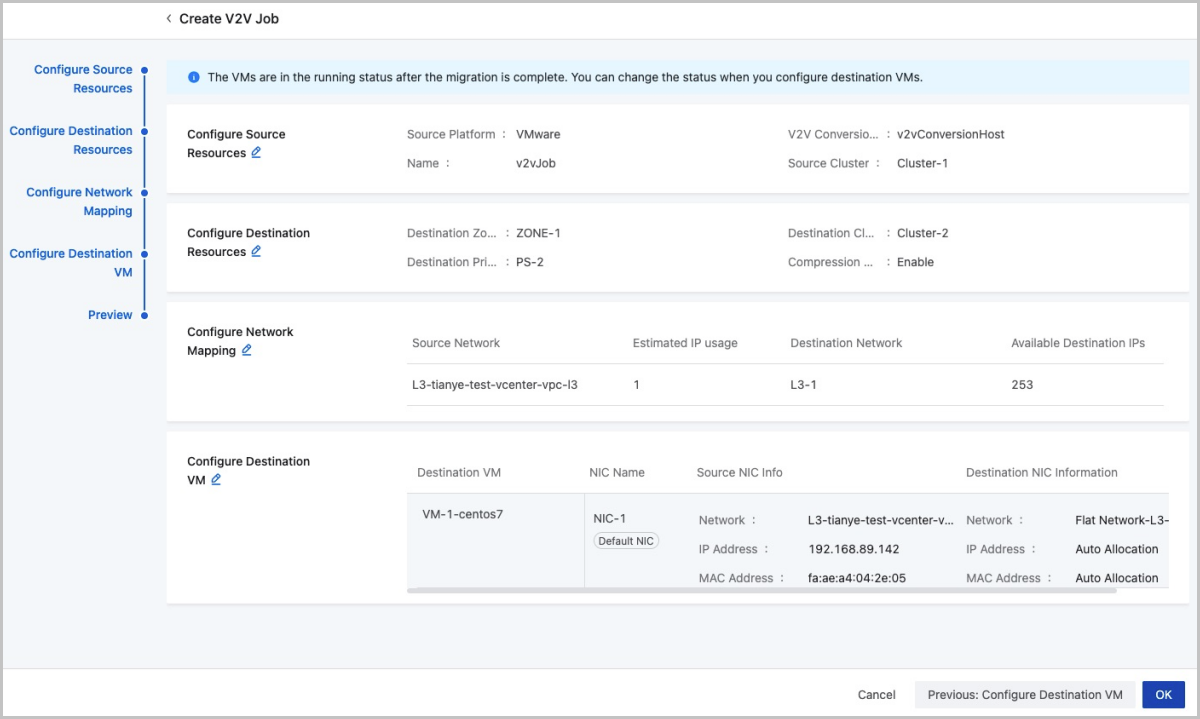
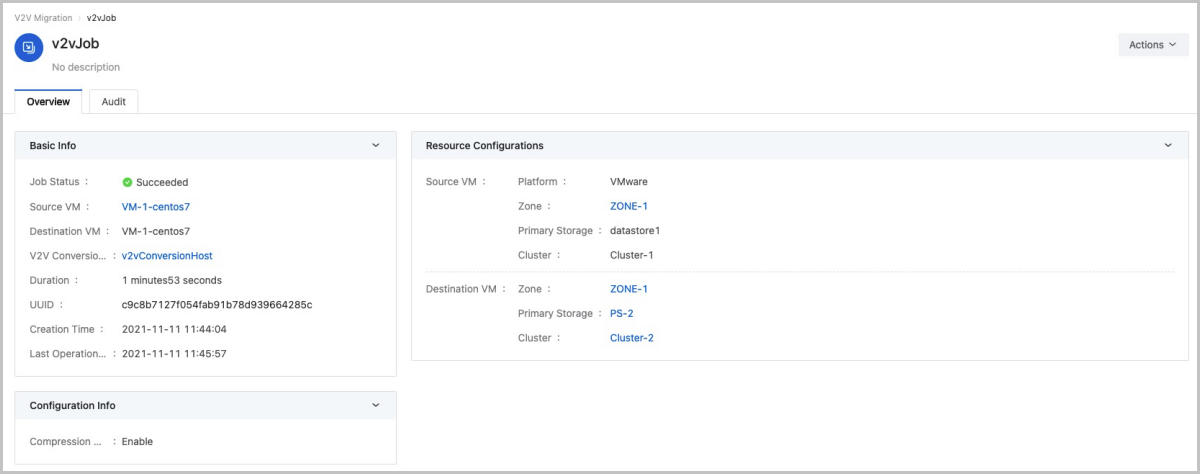
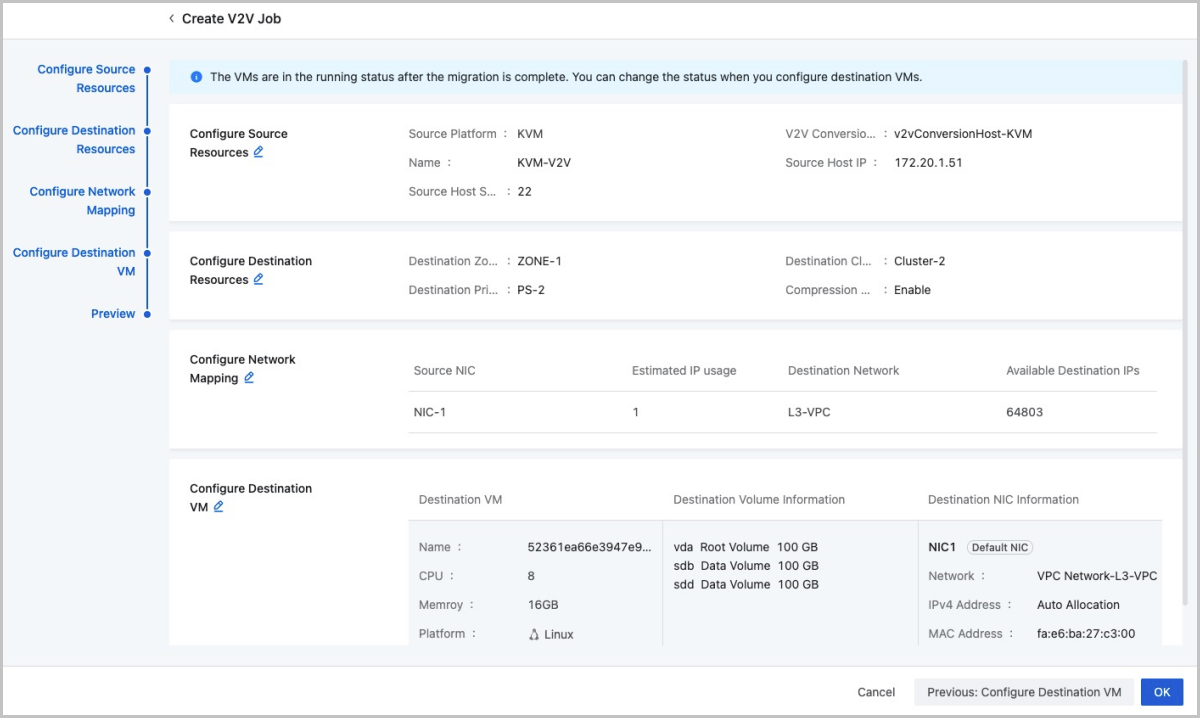
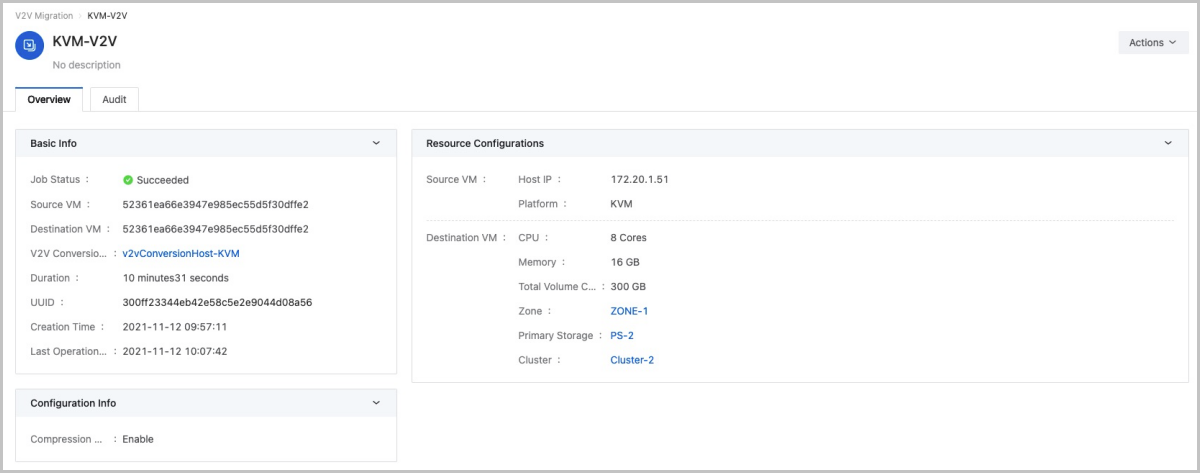
On the V2V Migration page, click on the name of a V2V job. Then, the details page of the V2V job is displayed. On the details page, you can view the V2V job status and the basic information about the source VM instance and destination VM instance.
 Note: Note: Before you select this option, create an SSH private key for the source host in advance.Note: Note: For VM instances with high I/O, we recommend that you pause them before migration to ensure the data integrity.
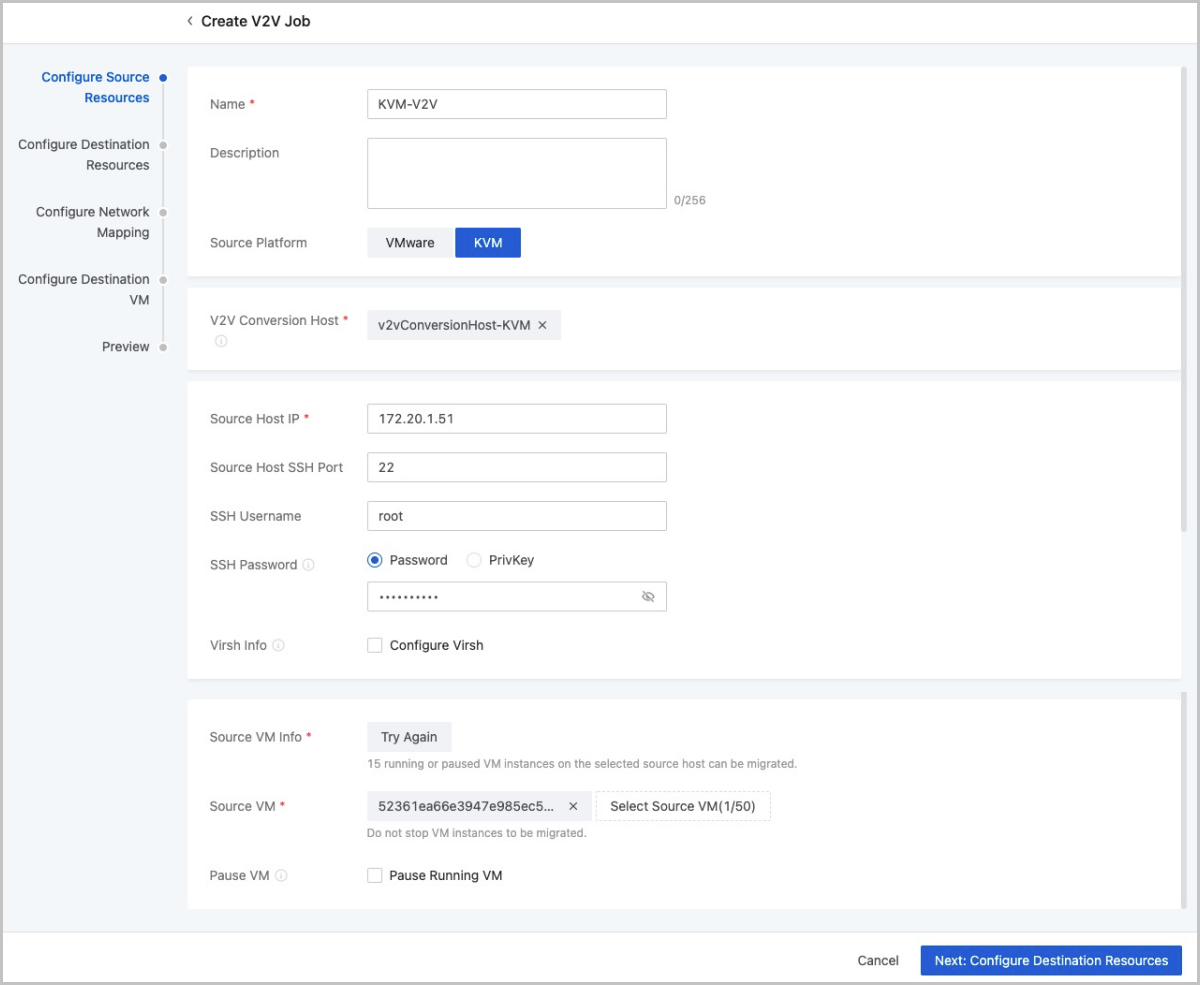 Note:
Note: 
 Note: If not configured, the IP address of the destination NIC will be allocated by the system.Note: If not configured, the MAC address of the destination NIC will be the same as that of the source NIC after migration.Note: Note: If not configured, the IP address of the destination NIC will be allocated by the system.Note: If not configured, the MAC address of the destination NIC will the same as that of the source NIC.Note: Before you migrate a VM instance to the current cloud, make sure that the VM instance has at least one NIC attached.
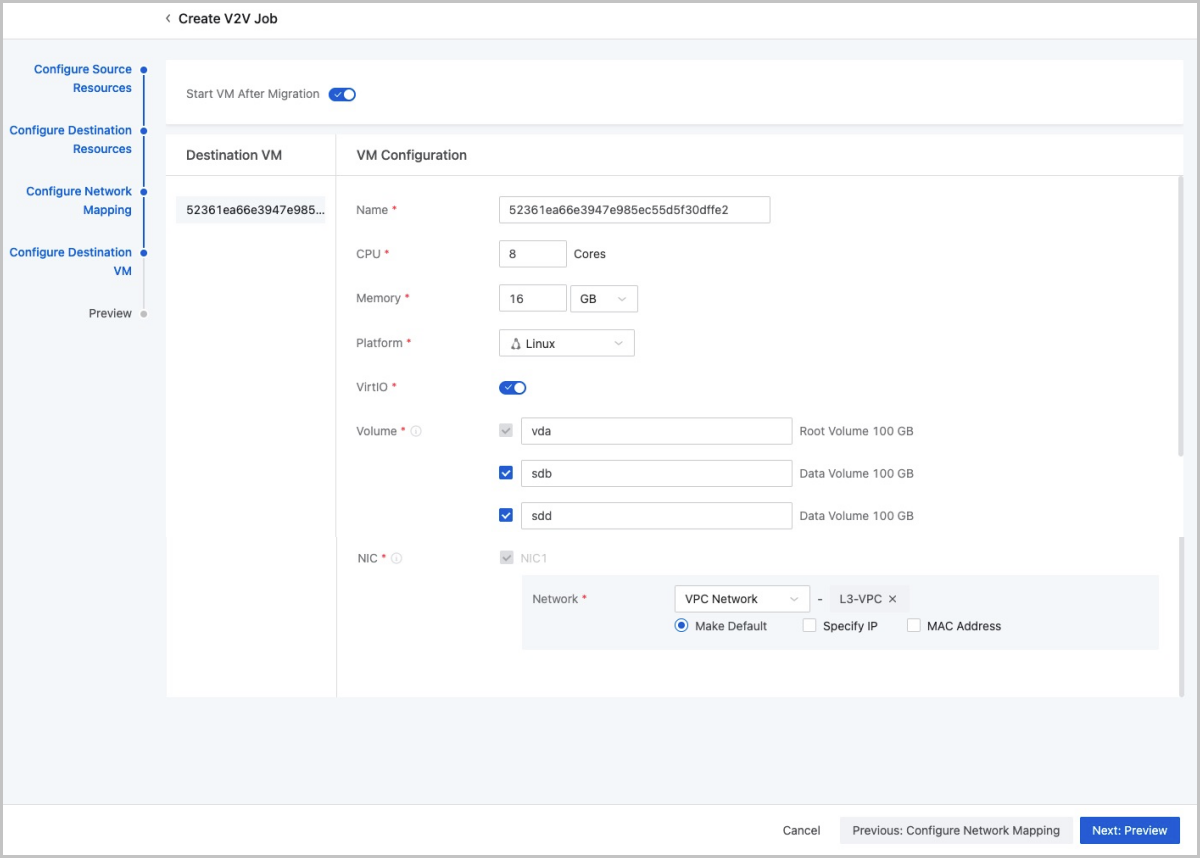
On the main menu of ZStack Cloud, choose . Then, the V2V Migration page is displayed.
| Action | Description |
|---|---|
| Reboot V2V Job | Reboot a V2V job if the job failed.Note:
|
| Edit V2V Job | Modify the name and description of a V2V job. |
| Delete V2V Job | Delete a V2V job after migration. |
On the V2V Migration page, click on the name of a V2V job. Then, the details page of the V2V job is displayed. On the details page, you can view the V2V job status and the basic information about the source VM instance and destination VM instance.
Email Us
contact@zstack.ioEmail Us
contact@zstack.ioThe download link is sent to your email address.
If you don't see it, check your spam folder, subscription folder, or AD folder. After receiving the email, click the URL to download the documentation.Thank you for using ZStack products and services.
Submit successfully.
We'll connect soon.Thank you for choosing ZStack products and services.

