To meet the need of various network usage scenarios, ZStack allows you to customize your configurations for vRouter tables and
vRouter route entries.
Create vRouter Table
In the navigation pane of the ZStack Private Cloud UI, choose Network Resource > vRouter Resource > vRouter Table. On the vRouter Table page, click
Create vRouter Table. On the displayed Create
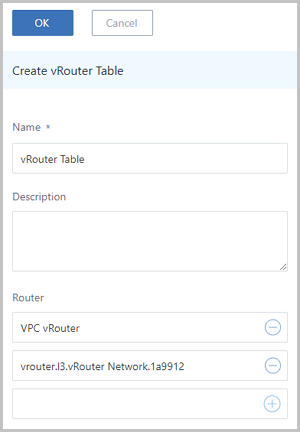
vRouter Table page, set the following parameters:
Name: Enter a name for the vRouter table.
Description: Optional. Enter a description for the
vRouter table.
Router: Optional. Select a router for the vRouter
table. When you create a vRouter table, specify a routing device to be
attached. Also, you can attach the routing device after you create the
vRouter table.
You can create a vRouter table, as shown in Create vRouter
Table.Figure 1. Create vRouter Table
Add vRouter Route Entry
On the vRouter Table page, select the vRouter table that you
created. On the details page of the vRouter table, click vRouter Route
Entry. On the vRouter Route Entry page, choose Actions > Add vRouter Route Entry. On the displayed Add vRouter Route Entry page,
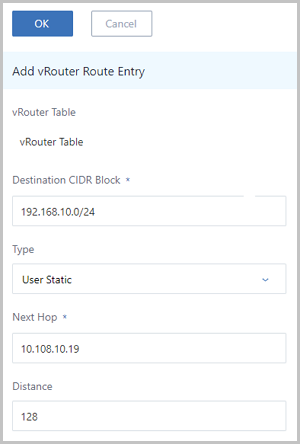
set the following parameters:
Destination CIDR Block: Se the destination CIDR IP
range.
Type: Select a router type for the vRouter, including
user static and user black hole. Generally, the router type is User
Static by default. To avoid loops, set User Black Hole to
discard the matched data packets.
Next Hop: Enter a next hop address to ensure that you
can reach the next hop.
Distance: Set a distance for the vRouter table. The
distance range for a vRouter is 1-254. The bigger the data reaches, the
lower the distance is.
You can add a vRouter route entry, as shown in Add vRouter Route
Entry.Figure 2. Add vRouter Route Entry
vRouter Table Operations
You can perform the following operations on a vRouter table:
Create vRouter table: Create a vRouter table. When you create a vRouter
table, specify a routing device to be attached. In addition, you can attach
the routing device after you create the vRouter table.
Add vRouter table: Add a vRouter route entry to the vRouter table in a
custom manner.
Delete vRouter route entry: Delete a vRouter route entry on the vRouter
table.
Attach router: Attach a regular vRouter and a regular VPC vRouter to the
vRouter table.
Detach router: Detach a regular vRouter and a regular VPC vRouter from the
vRouter table.
Delete: Delete the vRouter table.
Audit: Check the related operations of the vRouter table.